Water Gun Construction
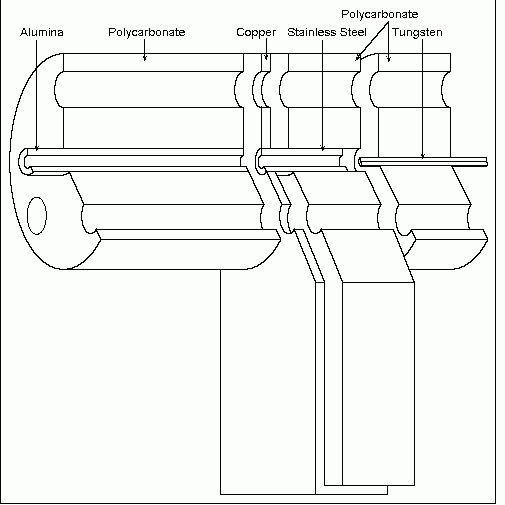
This is a two to one scale drawing of my attempt to reproduce
the launcher described in the patent. The muzzle end of the barrel
is formed from a 1.5" length of 3/32" ID X 3/16" OD high alumina ceramic
tubing (basically sapphire, actually closer to 13/64" OD). The breach
end is made from a 9/16" length of 3/32" ID X 3/16" OD 304 stainless steel
tubing. The breech is closed with a 0.5" length of 1.5" OD polycarbonate
rod carrying a 1" length of 0.040" OD tungsten welding electrode.
The ceramic tubing is epoxied into a 1.25" length of 1.5" OD polycarbonate.
The stainless steel tubing is press fit into a 3.625" X 1.5" X 0.0625"
copper sheet and slip fit into a 3" X 1.5" X 0.5" polycarbonate block.
The pieces are all held together with three threaded nylon rods.
The bottom of the rectangular block is drilled and tapped to accept the
3/8-16 terminal of my big pulse capacitors (see photos below).
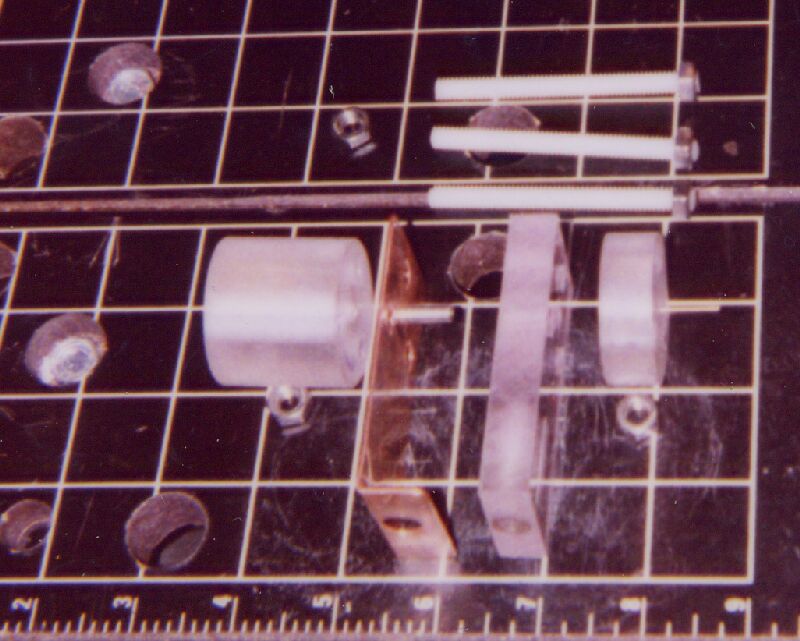
This is a photograph of the pieces partially assembled.
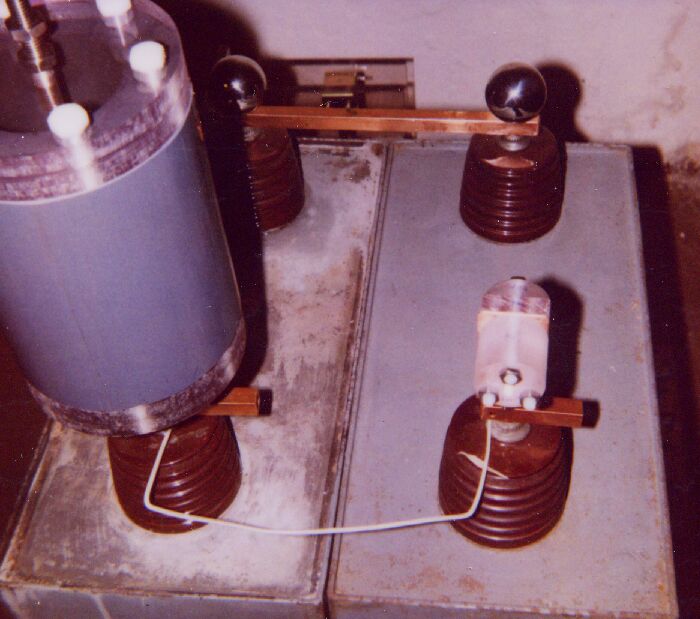
This is a picture of the assembled water gun mounted on my capacitor
bank. To the left of the picture is my triggered
spark gap. In operation, the output from the triggered spark
gap (off the top of this photo) is connected to the center electrode of
the gun via an air core inductor. The capacitors are charged and
fired just as in my can crusher.